|
|
本帖最后由 shc 于 2024-12-23 08:59 编辑
大家好!今天来介绍一下如何在微信公众号中接入自己的AI聊天机器人。微信公众号一般分为两种,订阅号和服务号。个人订阅号可以自由申请,无需企业资质审核,因此每个人都可以用这种方式在微信中接入自己的ChatGPT AI聊天机器人,可以分享给家人和朋友们使用。文末有演示效果。
下面我们就开始一步步具体介绍。本文作者为香菇肥牛,详细图文教程可以参考https://qing.su/article/ai-chatbot-wechat.html, 转载请注明原文链接,谢谢。
https://qing.su/article/ai-chatbot-wechat.html
1. 注册微信公众号
https://mp.weixin.qq.com 所有人都能注册的个人订阅号就可以。
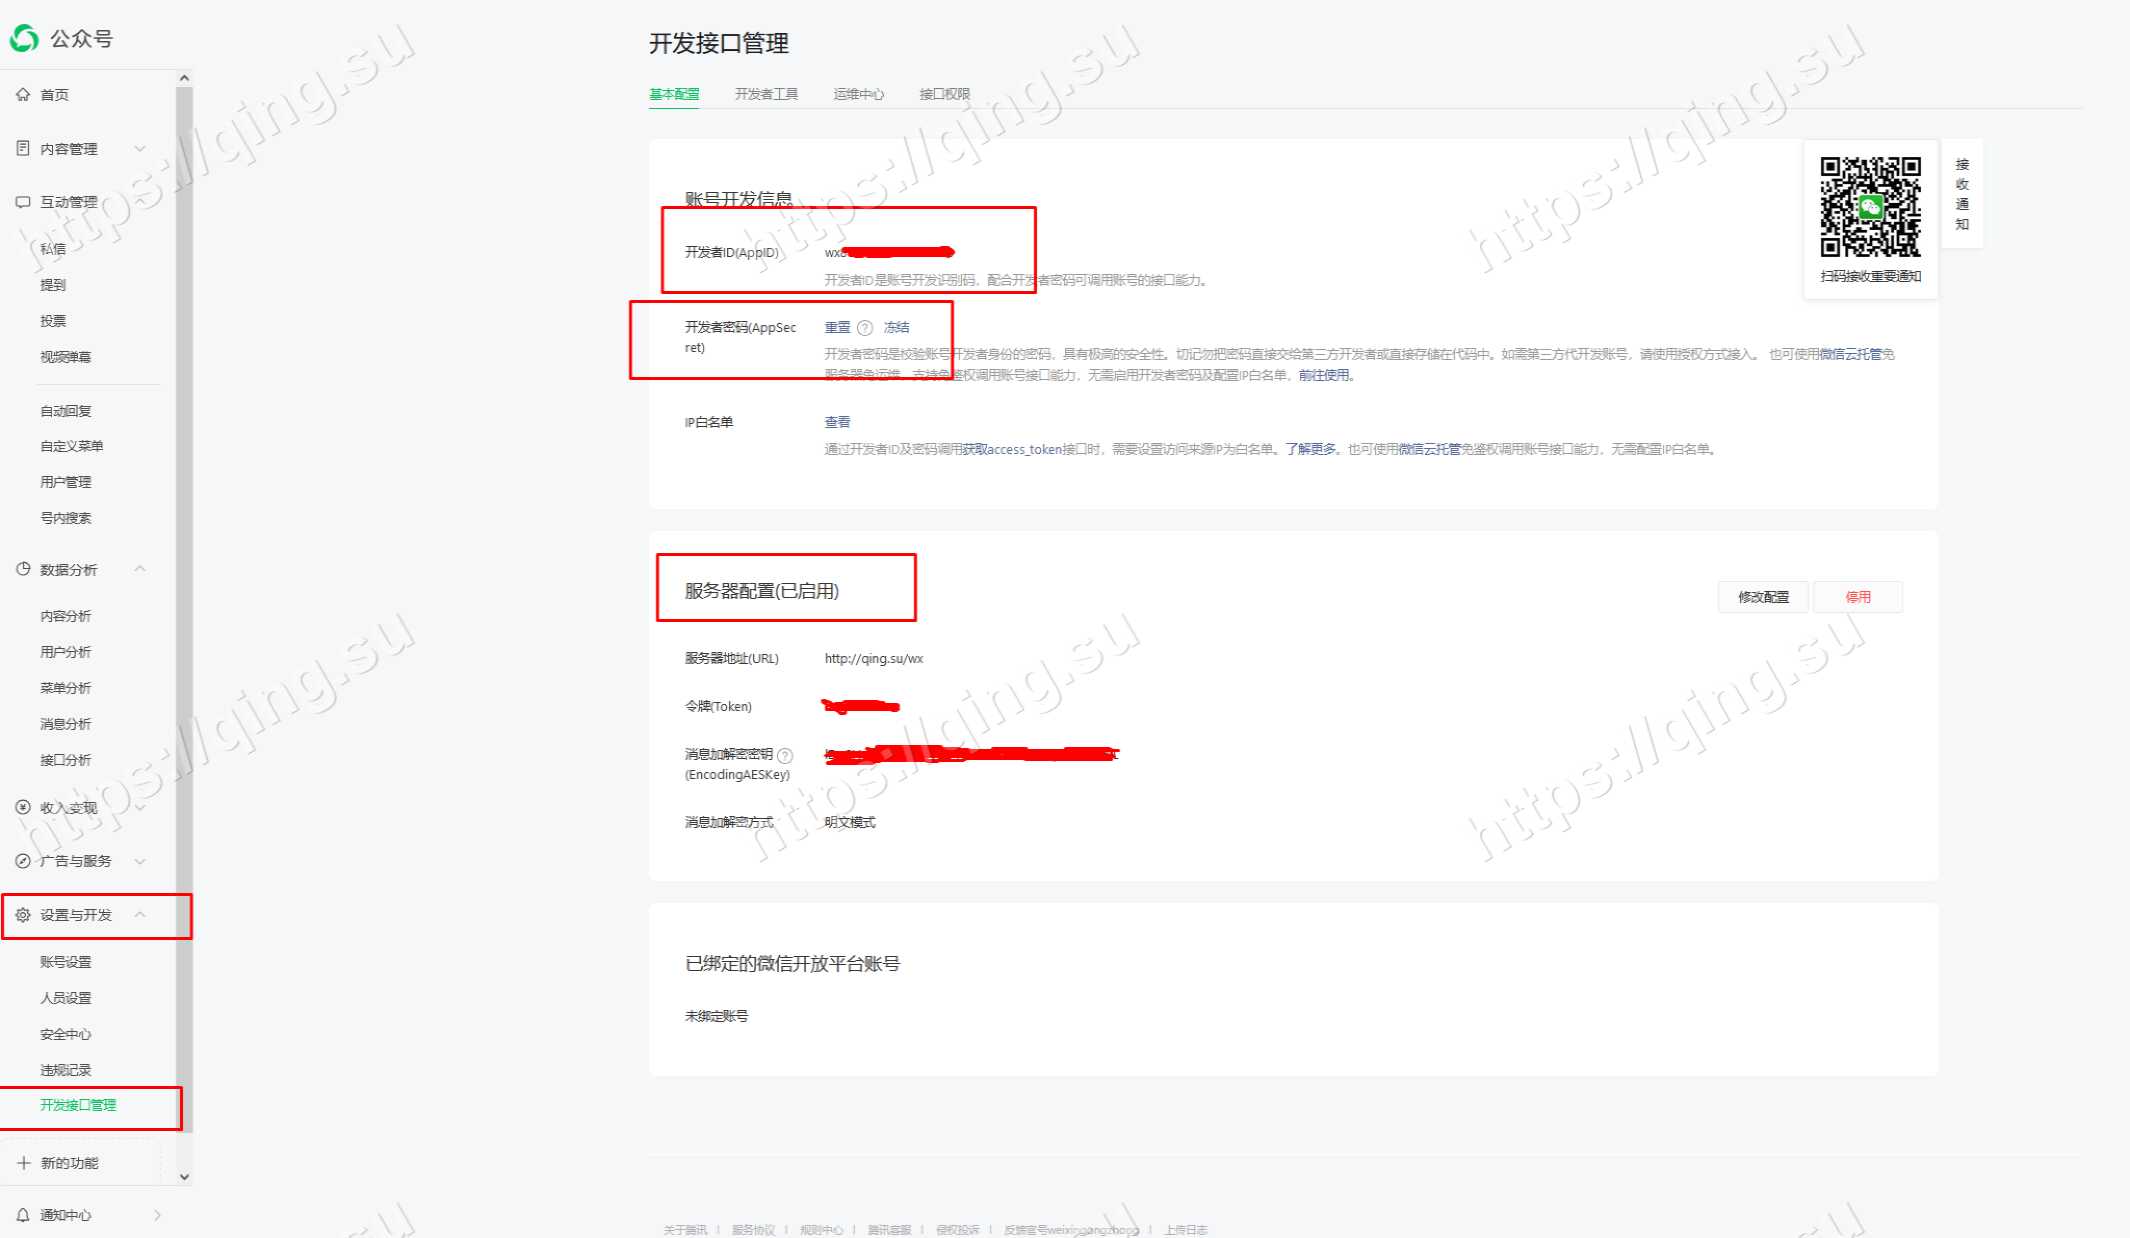
拿到APP ID和APP Secret

2. 注册AI平台
我这里直接用的OpenAI官方API https://platform.openai.com
3. 搭建服务
直接用Docker
docker-compose.yml
[ol]version: '2.0'services: chatgpt-on-wechat: image: zhayujie/chatgpt-on-wechat container_name: chatgpt-on-wechat security_opt: - seccomp:unconfined ports: - "8020:8020" environment: OPEN_AI_API_KEY: 'sk-proj-xxxxxxxxxx' MODEL: 'gpt-4o-mini' PROXY: '' SINGLE_CHAT_PREFIX: '["bot"]' SINGLE_CHAT_REPLY_PREFIX: '"[机器人] "' GROUP_CHAT_PREFIX: '["@bot"]' GROUP_NAME_WHITE_LIST: '["ALL_GROUP"]' IMAGE_CREATE_PREFIX: '["画"]' CONVERSATION_MAX_TOKENS: 1000 SPEECH_RECOGNITION: 'False' CHARACTER_DESC: '你是基于大语言模型的AI智能助手,旨在回答并解决人们的任何问题,并且可以使用多种语言与人交流。' EXPIRES_IN_SECONDS: 3600 USE_GLOBAL_PLUGIN_CONFIG: 'True' USE_LINKAI: 'False' LINKAI_API_KEY: '' LINKAI_APP_CODE: '' RATE_LIMIT_CHATGPT: 5 RATE_LIMIT_DALLE: 2 SUBSCRIBE_MSG: '感谢您的关注!这里是qing.su,你可以和我聊天,所有聊天内容用bot开头。' CHANNEL_TYPE: 'wechatmp' WECHATMP_APP_ID: 'wxxxxxxxxx' WECHATMP_APP_SECRET: 'xxxxxxxxxxxxxxxxxxxxx' WECHATMP_AES_KEY: '' WECHATMP_TOKEN: 'xxxxxxxxtoken' WECHATMP_PORT: 8020[/ol]复制代码
填入你的OpenAI API, 模型,微信公众号的APP ID, APP Secret, 然后随便填一个Token. 填好了之后启用docker
[ol]docker-compose up -d[/ol]复制代码
4. Nginx反代
[ol]apt-get install nginx -y[/ol]复制代码
编辑/etc/nginx/conf.d/wechat.conf
[ol]server { listen 80; listen [::]:80; server_name qing.su; access_log /var/log/nginx/wechat_access.log; error_log /var/log/nginx/wechat_error.log; location /wx { proxy_pass http://127.0.0.1:8020/wx; proxy_buffering off; proxy_http_version 1.1; proxy_set_header X-Forwarded-For $proxy_add_x_forwarded_for; proxy_set_header Upgrade $http_upgrade; proxy_set_header Connection $http_connection; } location / { proxy_pass http://127.0.0.1:8020/; proxy_buffering off; proxy_http_version 1.1; proxy_set_header X-Forwarded-For $proxy_add_x_forwarded_for; proxy_set_header Upgrade $http_upgrade; proxy_set_header Connection $http_connection; }}[/ol]复制代码
[ol]service nginx reload[/ol]复制代码
5. 关联公众号
在公众号后台,服务器配置里面填上地址http://domain.com/wx, 以及刚刚在docker-compose.yml里面设置的Token.
这样就搭建完毕啦。
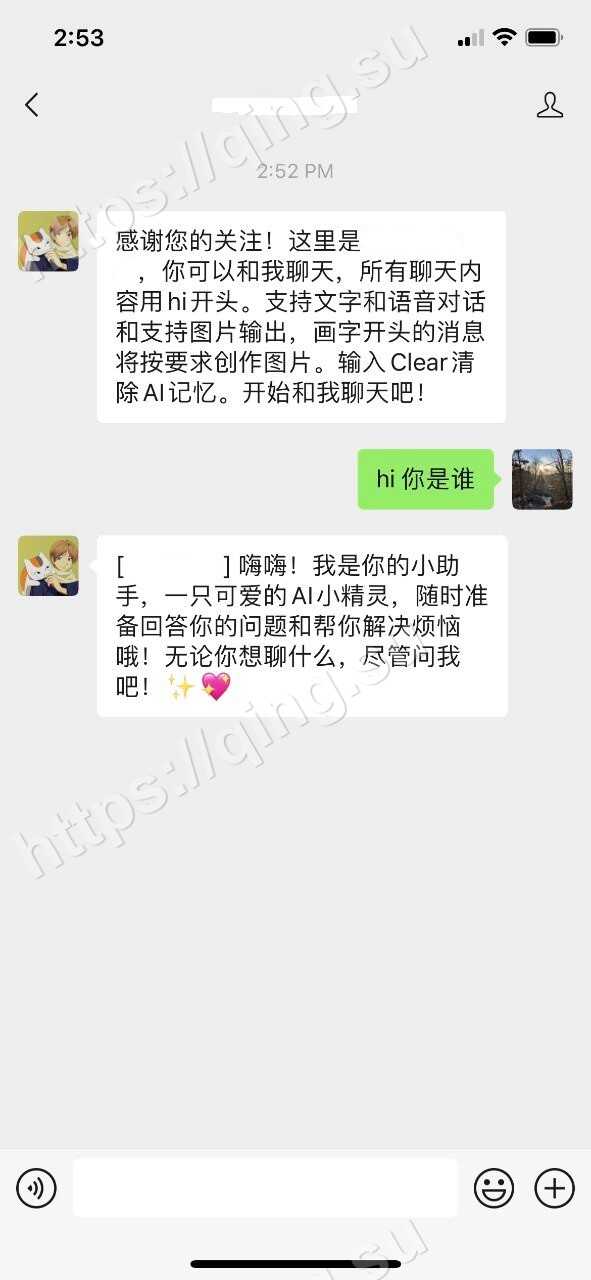
效果可以参考下面的截图,具体可以自己研究。

遇到问题可以留言讨论,详细图文教程可以参考https://qing.su/article/ai-chatbot-wechat.html, 转载请注明原文链接,谢谢。 |
|